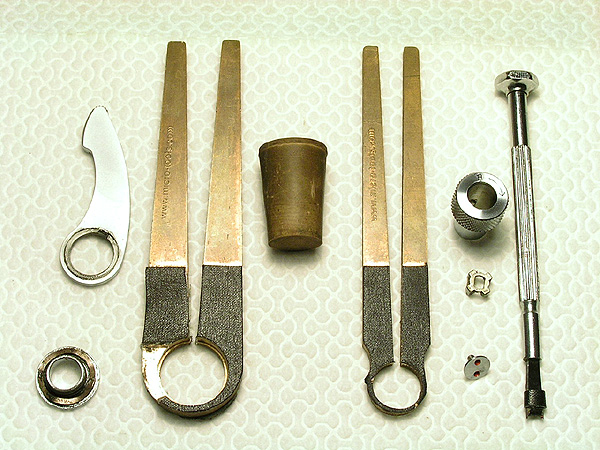
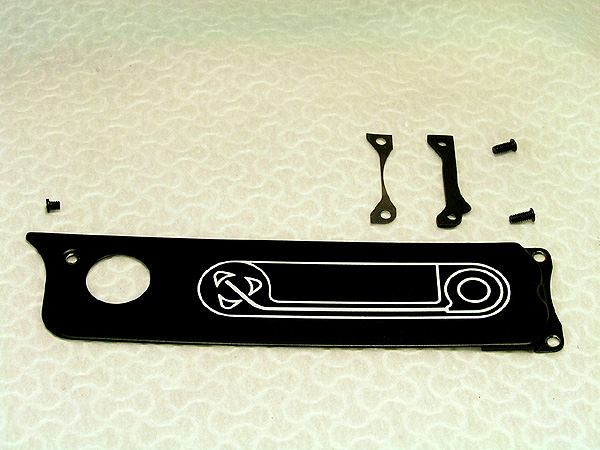
The tools you will need for this procedure: two flexiclamps from the
Micro-Tools M-Set, one of them needs to be modified. A screwdriver for
the
dotted screw of the rewind knob. A rubber plug serving as friction tool.
|
The copyright of all images shown
on this page is owned by J. Hild.
|
Leica MP: disassembly and adjustment of shutter speeds
by Joachim Hild, 2006.
I have bought an almost new MP a few weeks ago and was not very happy with the fast shutter speeds. By comparison with a camera I can trust, I found out they were way too slow. Between the shutter speed settings 1/60 and 1/1000, the deviation from the nominal shutter speeds amounted to almost one f-stop, which is definitely too much. I sent the camera to Solms but it came back untouched, along with the comment that "all shutterspeeds are within tolerance". As you can imagine, I wasn't very happy about that. So it was time for another "hands on experience".
I have previously worked on several M3 and M4p bodies and adjusted the shutter speeds to a precision high enough for slide film. Hence, I have the tools and some amount of experience. The internals of the MP is a successor of the M6 which followed the M3 so I expected no mayor surprises.The big question was how to lift the top cover to get to the slit adjustment and what is the purpose of that small plastic plug under the winding lever,are there any seals or not?
A general remark: All screws to work on are right hand threaded, some tools
are home made,see pictures/text, flexible clamps (Micro-Tools M-set) are highly
recommended. Take the batteries out before you start any work and set the shutter-speed
dial to "off". Please read the whole text before you start working.
A: Tools required
|
The tools you will need for this procedure: two flexiclamps from the
Micro-Tools M-Set, one of them needs to be modified. A screwdriver for
the |
|
|
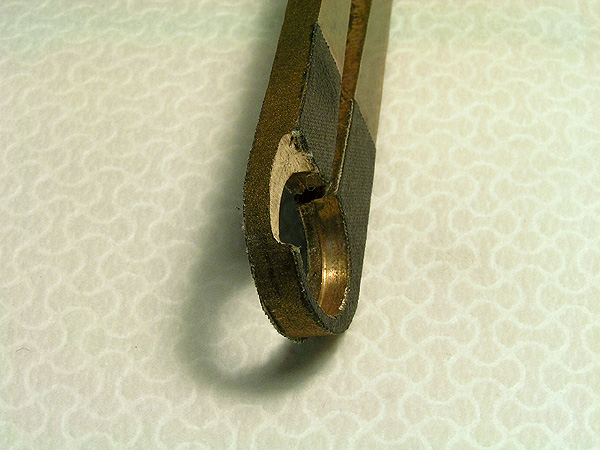
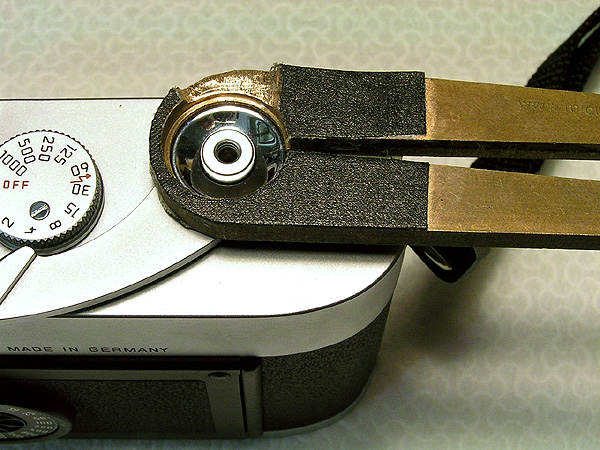
Close-up view of the flexiclamp required for the removal of the release
button. There are two different diameters available. The front side is
modified. |
 |
|
This Zirkel comes very handy for operations requiring a small spanner. |
 |
B: Disassembly
|
Remove the rewind knob with a small spanner and the friction tool. Block the fork in the film chamber e.g. with a big screwdriver. |
 |
| Remove the retaining ring with the small flexiclamp. Cover the clamp with tape to avoid scratches. Now it's already possible to lift the top cover a little bit. | 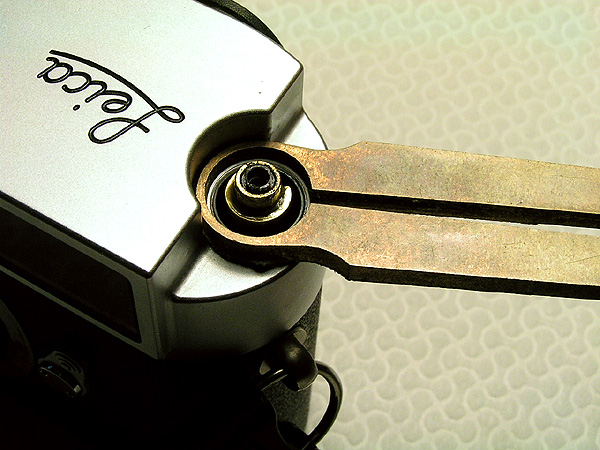 |
| After removal of the rewind knob. | 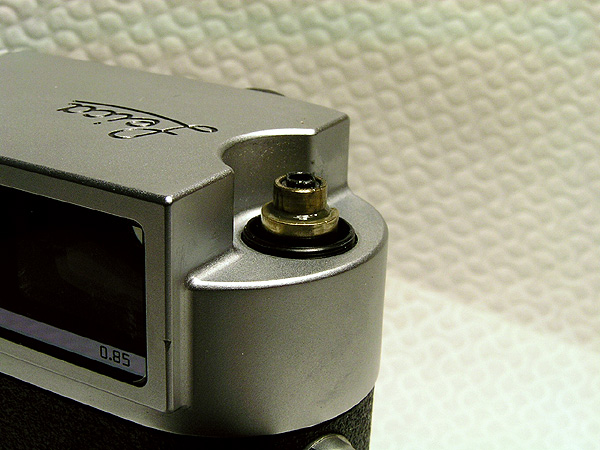 |
|
Remove the ring around release button with the large flexitool. Don't work against the mechanism, hold winding lever tight. |
 |
|
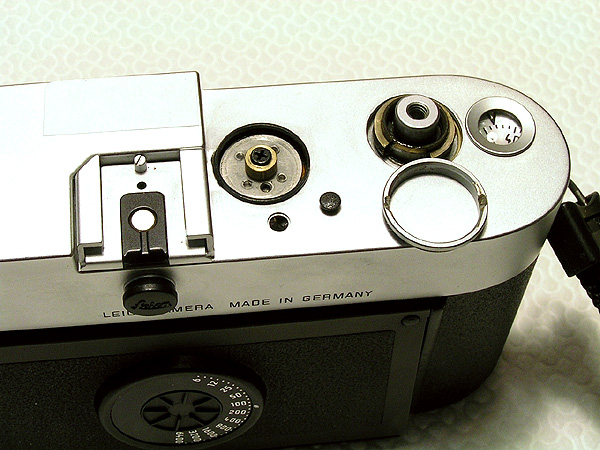
Remove the retaining ring under the winding lever with the flexiclamp. Due to the small distance between the ring and the film-counter window, it is necessary to file out a part of the clamp (see above). |
 |
|
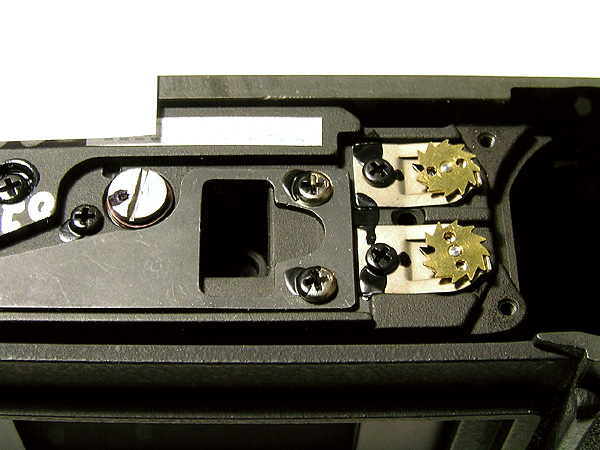
In order to remove the shutter-speed dial, remove the single slotted screw. Also remove the retainig ring underneath, I tried it with a spanner first and it slipped. After that you can lift the top cover. Note that in the picture the small plastic plug under the winding lever has been removed (see comments below). |
 |
|
Inside view. Just below the shuter speed dial you find a hole that was
covered by the the little plastic plug |
 |
|
Below the hole is the slit-width adjustment screw (arrow). Turning it counterclockwise reduces the slit width, turning it clockwise, the slit gets wider. |
 |
|
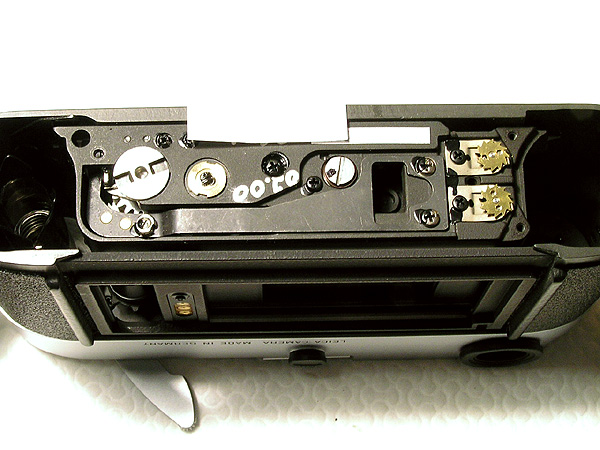
Now remove the bottom cover. The image shows a total view of the bottom with removed cover and inner cover plates. |
 |
|
The removed inner cover plates. |
 |
|
Close-up view of bottom. The big slotted bright screw on the left is
for shutter brake adjustment.
|
 |
|
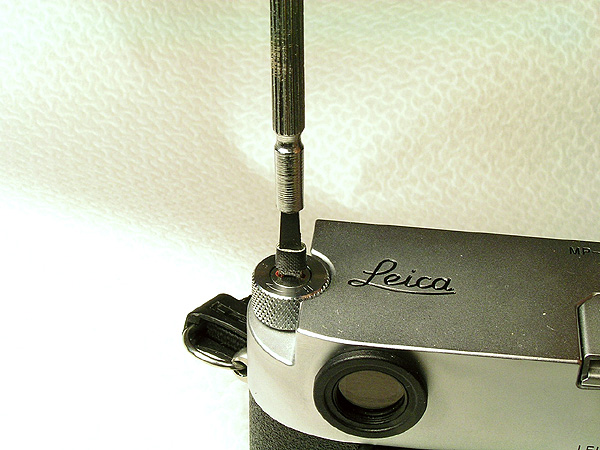
Spring adjustment is done with a small spanner tool. Press it downwards
through the little holes and turn as required. Let the stop-spring come
up again before you remove the tool |
 |
C: Adjusting procedure:
|
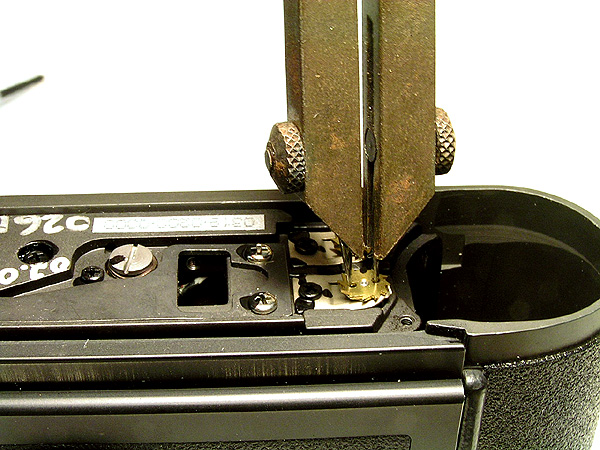
2. Remove the film door 3. Set the shutter speed to 1/1000 4. Release the shutter against a light table and look through from behind, do this several times to get a feeling of how it should be. 5. Stick a small screwdriver trough the hole on the top plate and turn the slit-width adjustment screw. Turn it counterclockwise in very small steps. Release the shutter after every step and watch the film window slowly becoming darker on the left side. I have turned the screw about 10° to the left on my camera
More comments: The M3 top cover is still very tight to lift, the MP cover lifts very easily, nothing is tight. The main purpose to do all this was the little plastic plug, I didn't know whether is was glued in, some kind of a seal or whatever, but I had a strong feeling the way to the adjustment screw was underneath it.I didn't want to damage it or the chrome around so I went the long way round. After I finished my work I didn't put it back in again, I used a black slotted screw instead from my large collection. It is a big screwhead with a very small and short thread, but the screwhead fits exactly in the cover. I have not glued it in, I used black window colour as a glue and seal, of course very little of it. Therefore it's easy to break the seal/glue and open the hole again. The screw can not fall inside and looks very good, it's from an old Zorki camera.
|