|
The copyright of all images shown
on this page is owned by M. Feuerbacher.
|
Leica M4p: removal of top cover, cleaning
of finder
by M. Feuerbacher, 2006.
Although I have some experience in repairing rangefinder cameras,
I hesitated before I had the heart to approach my Leica M4p. I works fine, but
the viewfinder was very dirty. The finder image was blurry and had much lower
contrast than it should. On the other hand, I did not want to send it to the
Leica customer service, as this is always a very expensive matter and, of course,
for a well versed camera-repair person, it is a point of honour not to engage
the professional service for a mere cleaning job. So I used it with the dirty
rangefinder for almost two years - and then I opened it up.
The procedure for top-cover removal is shown for a Leica M4-p.
It should, however, with only minor changes also apply for all other Leica M
cameras except the M5.
Please read the instructions completely before you start. Some
additional words of caution: Do not wind and fire the shutter after removal
of the film-advance lever and take care that the shutter release button does
not fall out (there are some small rings under it). Do the repair in white tray
or on a white towel in order to make sure that you dont loose any small parts.
Leave the body cap on the bayonet during the repair so that no parts or tools
can fall into the body and damage the shutter curtains.
I acknowledge the help of Michal Ott, who has borrowed me a special
tool, and helped me out when I was stuck in the process before removing the
flash sockets.
|
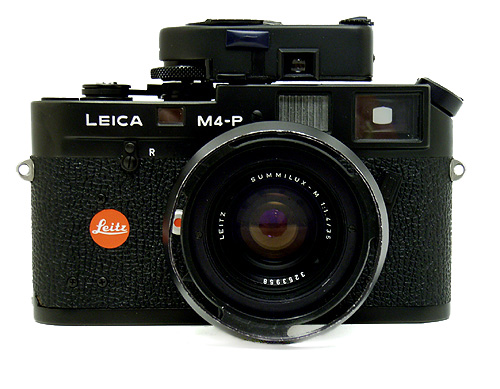
This is the candidate with a mounted leicameter and Summilux 35 mm, photographed
before the surgery. Unfortunately I forgot to take a close up of the finder
window. However, it can be seen that the finder appears somewhat foggy.
The most challenging part is not the cleaning of the finder but the removal
of the top cover. In contrast to other rangefinders, it is attached by
several screws and other fittings, that all have to be removed. For some
parts, special tools are required, as you will see below.
Now first start to disassemble all exterior parts:
|
 |
|
The film-advance lever poses the first serious difficulties. The upper
screw nut has no slits. You have to open it with a friction tool or with
special pliers. As usual with Leica gear, in my exemplar the nut was very
tight, so the approach with the friction tool did not work.
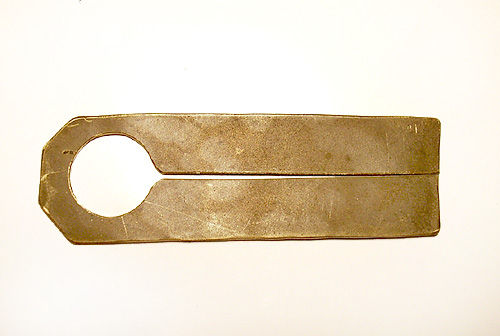
To make a plier for the screw nut is relatively easy. Cut a piece of
brass (thickness about 1 mm) into the shape shown on the right. The diameter
of the hole should be about 16 mm (the diameter of the nut is 15.5 mm).
Make sure that you remove all sharp edges and burrs (grind it with carefully
with very fine sanding paper) in order to avoid scratches on the camera
when you use it.
I borrowed this tool from Michael Ott (thanks again, Michael!).
|
 |
|
The screw nut has a right-handed thread. When you have removed it the
lever comes off. Between the two you should find a washer.
Remove the outer ring around the shutter release with spanner tool. I
used tip-nosed pliers as a substitute.
|
|
|
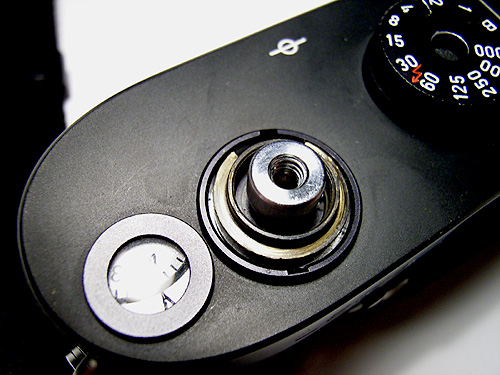
Now remove the rewind crank. Flip open the crank and you find a very
small set screw on the side of the axis. Remove the set screw. Open the
bottom plate of the camera and block the shank inside the film chamber.
Then turn the rewind crank clockwise.
Remove it completely. Under the crank you find four washers. Make a note
how they were ordered. Under the washers another screw nut appears, which
needs a spanner to be removed (or, alternatively, tip nosed pliers).
|
|
|
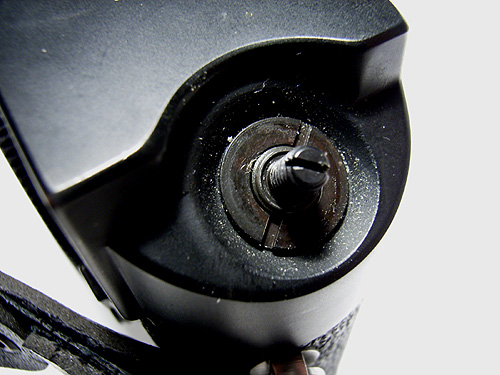
Removal of the exposure-time selector is straightforward. Just open the
cross-head screw and lift the wheel off. Take care not to loose the small
black platelet under the wheel. Under the platelet comes a large slit-head
screw. You dont have to open this one.
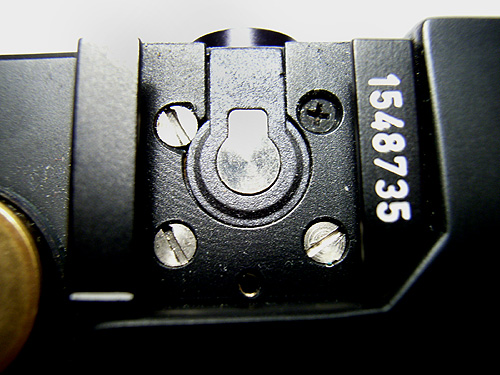
Next comes the accessory shoe. Remove the long black screw and pull out
the cover plate. Under it you find four screws (three slit- and one black
cross-head screw). Remove all crews.
|
 |
|
Accessory shoe and exposure-time selector removed.
|
 |
|
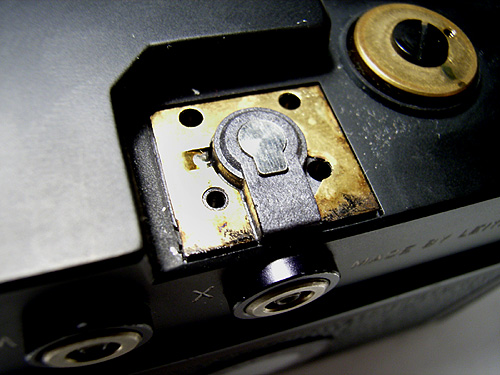
Remove the flash sockets. Take the outer black ring with pliers and protect
the screw (and the body) by putting a piece of soft rubber (e.g. a bycicle
tire) in between. Remove the outer black ring, then, similarly, remove
the plug itself. When the plug comes off, the small inner contact falls
out too.
The picture shows the camera with removed X contact and installed M contact.
|
 |
|
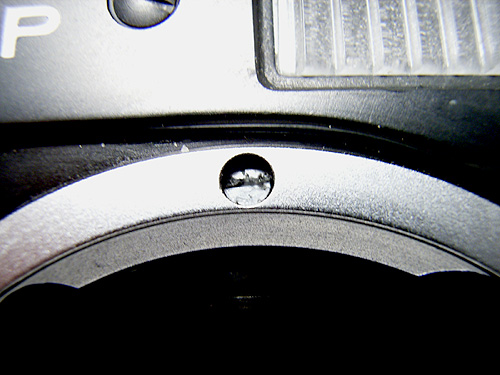
Eventually, you have to remove the secrect screw. In the bayonet, the
upper hole is filled with black paste. (In former Leica M models, the
paste is embossed with a Leica-like "L", which acts as a protection
seal against unauthorized repair attempts).
|
 |
|
Remove the paste. Underneath you find a screw. Remove the screw. The
top cover can be removed now.
|
 |
|
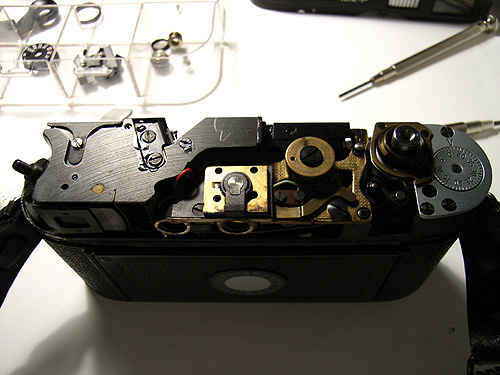
The rest of my cleaning job was easy, as only the inside of the glass
in the top cover was dirty.
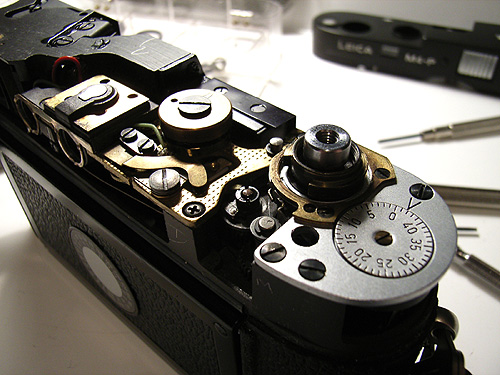
The next pictures show how the camera looks like without the top cover.
|
 |
|
Shutter release and and film counter section.
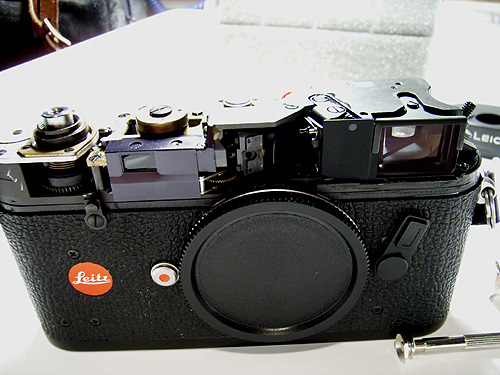
|
 |
|
Front view.
Reassembly is straightforward.
|
 |