|
The copyright of all images shown
on this page is owned by M. Feuerbacher.
|
Pad replacement in a Yashica Electro 35
by M. Feuerbacher, 2003.
This article is based on a text presented by Erik
Fiss on his website. I have translated it into English, and I have added
or modified some passages according to the experiences I made when replacing
the pad in my GSN. The procedure described is valid for the models 35, G ,GS,
GT, GSN and GTN. I do not know if in the GX and CC similar pads are used and
if description presented can be transferred to these models.
The Pad is a rubber spacer which is placed between the primary
and secondary shutter release mechanism. After some decades of use, the Pads
used in the Electros tend to detoriate. If you have an original Electro, the
chances that the Pad in yours need to be replaced are high. Some symptoms are
- Inconsistent behaviour of the shutter, particularly at long exposure times.
For example, the shutter might stay open until you release the button (as
for "B")
- When you press the shutter release, there is no significant friction for
the first millimeters. Pressed halfway the button instantly couples to the
shutter mechanism
- Transporting the film no distinct "clunk"-sound can be heard
Tip: Read the following completely before you start
1. Open the upper body cap and bottom plate
The upper body cap is opened as usual for rangefinders. Remove all handles,
etc. For the Yashica Electro you have to take care that the battery-test button
does not fall into the body. Before removing the cap, simply attach it with
some adhesive tape. Note, as usual, that the cap is connected to the body by
the flash wire. No particular surprises will take place opening the bottom plate.
2. Locate the pad
|
The position of the pad can be seen from the front of the camera just
below the meter aperture. (Arrow in Fig). If there is a black or white
piece of rubber of about 5 mm side length between two metal plates the
pad seems to be ok. The picture shows a situation in my Electro 35 where
the repair is necessary. Only some small pieces are left.
In my Electro 35 and my GSN the remnants were orange-red, but according
to Erik Fiss black
pieces can be found as well.
|
 |
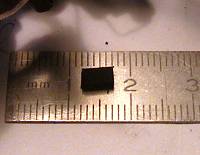
As a replacement for the old pad you can use any piece of hard
rubber with a size of about 3 x 5 mm and a thickness of 2 mm. (Note: In my GSN,
first tried a pad of 3 mm thickness. With this pad, however, the shutter did
not fully couple to the release lever on the lens barrel. For this reason I
recommend not to exceed a thickness of 2 mm, which works well in my camera).
It is not very likely that you are able to replace the pad from
the front without further disassembly of the camera. I tried (of course) but
after some fumbling the new pad fell into the body so I had no choice.
3. Further disassembly
- Remove the leatherette starting from the lens barrel. Be careful that you
do not tear it. Pull back the leatherette until you see the full front plate,
which is attached with four screws.
- Open these screws AND the screw on top of the camera shown in the figure
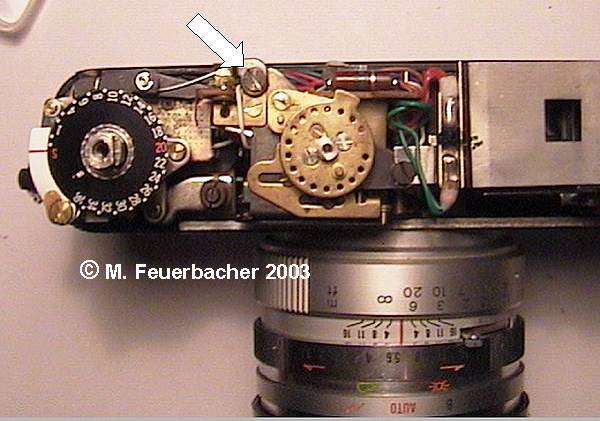
- Are you sure you want to proceed? The following steps will interrupt the
coupling of the body to the shutter, the shutter cocking mechanism and the
focusing / parallax-correction handles. Reassembling the camera may take hours
of intense fumbling....
Well: Take the lens barrel and pull it away from the body. Be careful and
watch how the pieces fit together. Don't use brute force - nevertheless you
have to pull distinctly. If the pieces can not be separated competely turn
the film advance lever while you pull the lens barrel. This brings the shutter
cocking mechanism into the right angle. You need three hands to do this.
- On the back of the plate the lens barrel is attached to, you find two vertical
rods with springs around them. These are the primary and secondary shutter
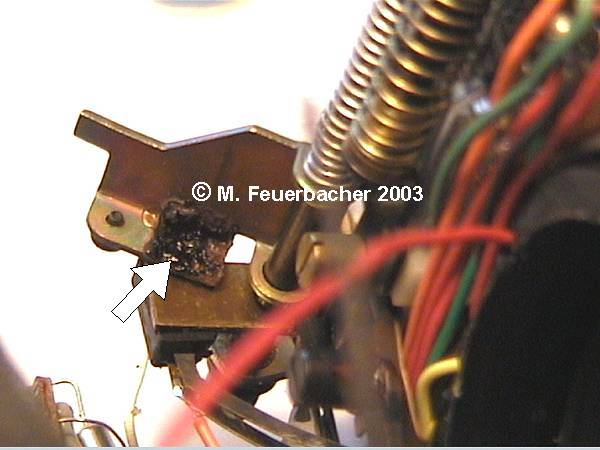
releases. The pad is located behind the metal piece shown (arrow) in the figures
below.

- If you gently pull the rods upwards, you can turn the metal piece and you
have direct access to the pad position. The leftovers of the detoriated pad
are seen in the next figure.
4. A new pad
| Remove the remnants of the old pad e.g with lighter gasoline or scratch
it away. As new pad you can use any piece of hard rubber of the size 5 x
3 mm and a thickness of 2 mm. Glue it to the upper metal part, the one which
you have swept aside at the position where you have removed the old one.
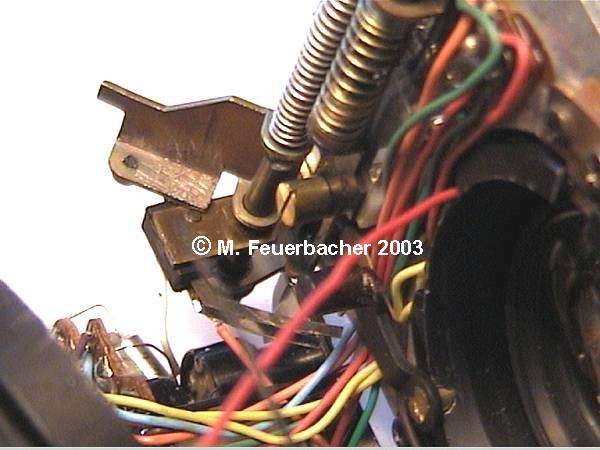
Wait until the glue is dry. Then turn back the metal piece. Take care, there
are some tiny contacts above it, don't bend them. |
 |

5. Reassembly
Put the plate containing the lens barrel back onto the body. There
are three connections which you have to get into place simultaneously. The connection
to the shutter (on the left), the shutter-cocking mechanism (middle) and the
focusing / parallax-correction handles (right).
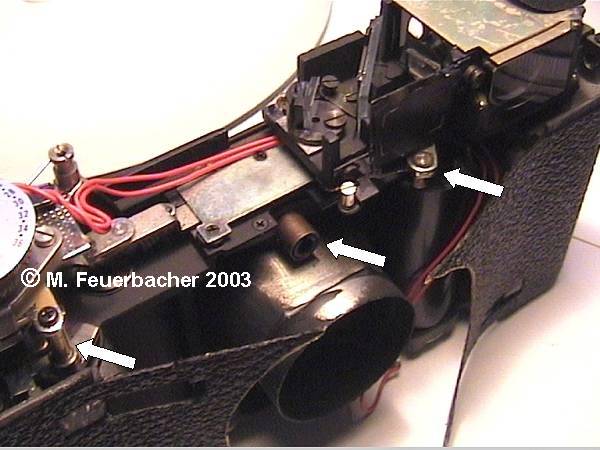
The shutter-cocking mechanism couples to the body via a rod which
at its end contains another very small rod (See the third figure on this page).
It has to be turned into the correct position to fit into the corresponding
part of the body. You might need to turn the film transport handle.
This part of the reassembly is a tedious job and might keep you busy for some
hours. Stay calm, work slowly and watch the process from all perspectives you
can find. When the lens is eventually attached to the body insert the screws
and test if the shutter works. The rest of the reassembly is straightforward.
Note that in this article I have mixed up images taken during
the dissection of an Electro 35 and a GSN. The principle is the same for both
cameras but some parts (e.g. the shutter cocking mechanism) show minor differences.


