The copyright of all images shown on this page is owned by M. Feuerbacher.


Shutter surgery on an Aires 35 IIIL

by M. Feuerbacher, 2004.

The Aires 35 IIIL rangefinder was released in the 1950s. This is a fine camera with a sharp lens. My specimen showed some symptoms which seem to be rather typical for this model. The leaf shutter was sticky and the aperture was not working correctly - only two of the five blades moved, the other ones were stuck and remained fully open whatever the aperture setting was.

You can reach the shutter blades as well as the aperture from the front side. The aperture is positioned behind the shutter. Hence, coming from the front you can only work on it through the shutter locked in open position. You dont have to remove the rear lens cell going this way, however.

In order to open the lens barrel you firstly have to remove the small lock screw on the outside of the filter ring. This allows you to remove the filter ring. The thread is right handed, and so are all the others in the following.

The aperture ring also comes off immediately. Then, remove the name plate ring. It is locked by three small screws on the side.
Remove the three brass screws, then you can remove the ring with the cuts (which connect the exposure-time to the aperture dial).

Remove the three big screws seen on the outside of the ring showing the exposure-time scale. Then you can take it off - take care with the X/F/M selector, which is positioned on the left hand side.

The front lens cell is now freely accessible and you can screw it out as a whole (RH). If you have to use pliers to turn it, protect the barrel by some tape and be careful not to harm the front lens.

Now you can directly access the shutter blades.

If you want to clean the aperture blades, lock the shutter in open position. Set the exposure time to B (by turning the cogwheel-like outer ring). You can lock the shutter using a cable release with a lock screw, or put something between the shutter release lever and the corresponding arm as shown in the picture.

The long brass lever seen on the right of the image is the aperture selection lever. Use it to open and close the aperture during cleaning.

This is how the aperture in my Aires looked like in nominally f/16 position. According to Dan Mitchell this is a frequently encountered problem with this camera.


To clean the blades use lighter fluid or petroleum benzine. The fluid can be applied best with a piece of lens-cleaning paper held using a tweezer.

If you need to go further to clean the shutter mechanism itself turn the screw with the three little holes above by 180° with a tweezer. Then you can can turn the inner metal plate by some degrees, such that the locks can escape through the three cutouts in the inner thread.

This image shows the shutter with the cocking rack on top of it.

Lift off the cocking rack and the shutter is accessible. Use lots of lighter fluid (or petroleum benzine) to clean the gears and the pivots. The pivots of the shutter blades are also accessible from here.

In order to fire the shutter you have to put the cocking rack back into place and also push the inner ring (arrow), which easily slips upwards a bit, down into position.


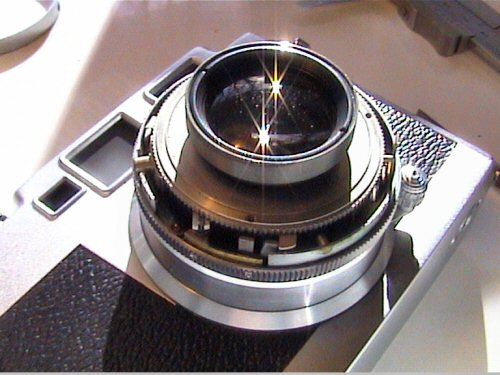
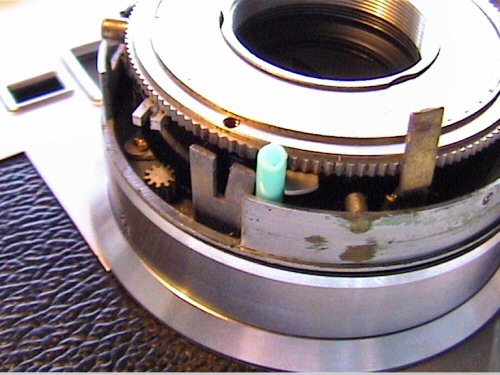
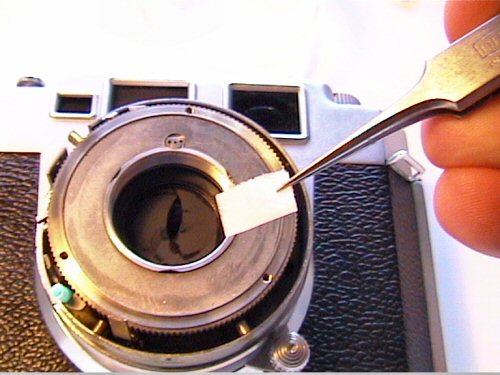
As usual with this kind of operation you might need several cleaning attempts before the shutter and aperture start to work correctly. When you manage to get everything into working condition, let the camera disassembled for a day or two, if necessary with the shutter opened so that all the fluids can evaporate. Putting the whole thing back together is straightforward (or should I say straightbackward?).

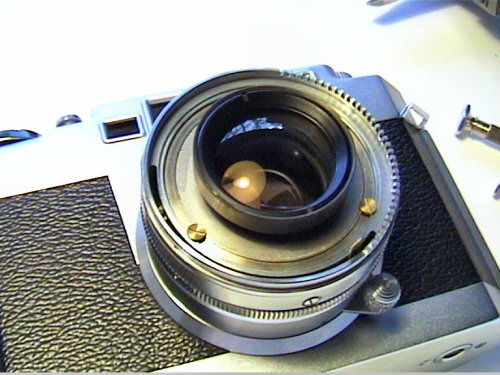
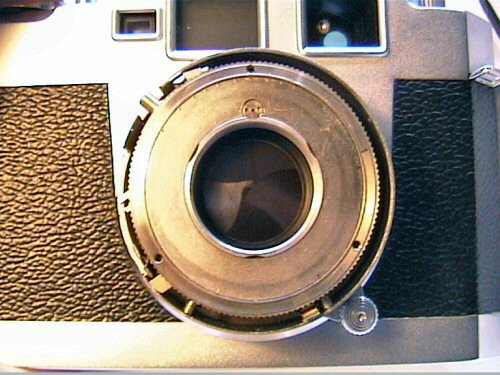
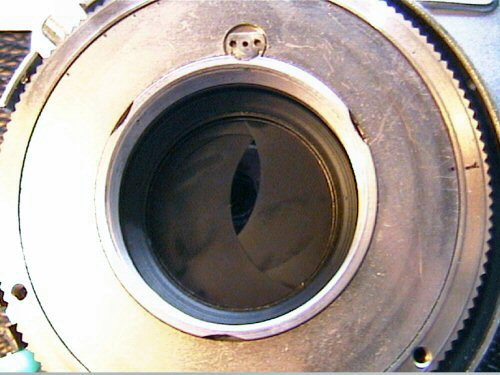
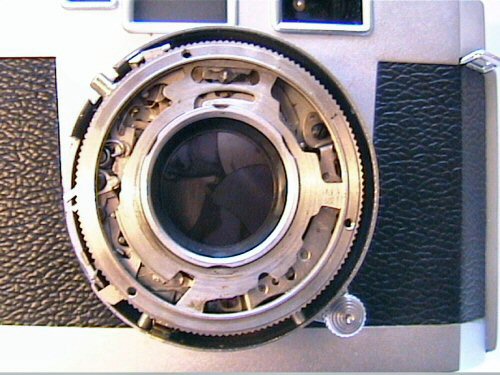
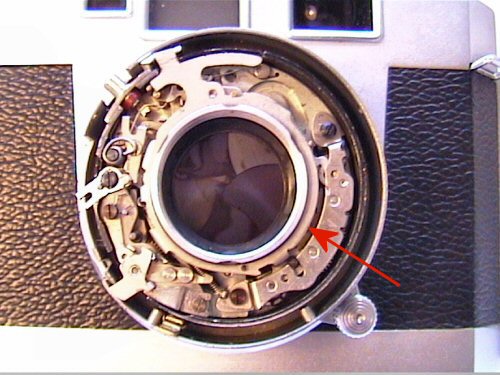
It may happen that even after extensive cleaning the full functionality cannot be restored, e.g. if the back side of the aperture blades is also considerably dirty. In that case, you might be forced to go further, which is not very pleasant since the rear-lens cell is not very well accessible through the film chamber and the removal of the lens barrel is difficult because of the brittleness of the leatherette. Please have look at the website quoted below for furthergoing repair procedures.

This article only covers a small part of the repairs that frequently have to be done on this camera. A very detailed and well illustrated repair description including the removal of the top cover and the lens barrel is provided by Dan Mitchell on his website. Dan also gave me some important hints I needed before I could do the repair shown above. Thanks Dan!